DIY cold heart cake. Cake “Frozen. List of required components
A cake on the table is always bright and festive. And, standing in the store, adults, like children, are happy to look at just such: bright, beautiful and painted desserts. Of course they are attractive. This is the cake on our table today. The children liked it, especially the older ones, since they watched the cartoon “Frozen” many times, read the book just as many times, and put puzzle pieces together into pictures just as many times.
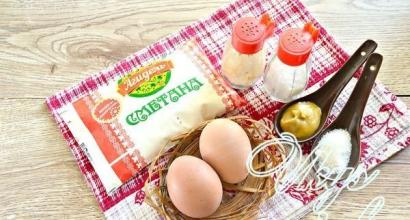
To make the Frozen cake, you will need a sponge cake prepared according to classic recipe, two types of cream (custard and protein-custard), a chocolate bar, apple juice for soaking, a picture of your favorite characters printed on paper, love and an hour and a half of free time. Before serving, you need to let the cake brew for several hours and brew aromatic tea.
Prepare the necessary ingredients.

Let's start cooking with custard: you need to combine sugar with a pinch of vanilla and one chicken egg. Beat with a mixer into a homogeneous mass and, a minute or two after whipping, pour in one part of the milk. Separately, combine the second part of the milk with flour. Combine the two masses, beat again with a mixer and put on medium heat. Stirring constantly, bring to a thick, homogeneous state. If the cream ends up with lumps, no problem - grind through a fine sieve.

Cut the cooled sponge cake into two layers, soak in apple juice and generously coat with cream.

Set aside and melt the dark chocolate. Make a cornet from a corner of the file, fill it with melted chocolate and cut off the corner. Place the sheet with the printed design in a file and outline the outline of the design with chocolate, drawing even small details. Send the file along with the drawing to the refrigerator until completely frozen.

Let's start preparing the protein custard. To do this, you need to cook sugar syrup: pour sugar into a saucepan and pour in water. Put on the fire, stir for the first few minutes and reduce the heat. Boil for 7-8 minutes without stirring. To check if the syrup is ready, you need to drop a little into cold water: If the ball rolls easily, it’s ready.

While the sugar syrup is cooking, you need to start whisking two chicken squirrel to persistent peaks. And then, without slowing down, pour in the hot syrup in a thin stream. Continue beating until completely cooled, 7-8 minutes. Apply the cream to the top layer of the cake in a thin and even layer.

Carefully place the chocolate pattern on top, pressing slightly.

Fill a pastry syringe with a thin nozzle with cream and “paint” the snowman in White color, filling the entire surface between the chocolate contours.

Color the rest of the cream sky blue and paint the entire remaining surface of the cake, pipetting small parts of the cream with a “snowflake”, “star” or a medium round nozzle. Apply the cream also to the sides and smooth with a spatula. Draw eyes for the snowman.

Add another 1-2 drops of dye to the remaining cream and plant blue spruce trees along the edge of the cake. Decorate with colorful sprinkles. The Frozen cake is ready.

Let the cake sit for at least 1 hour before serving.

Bon appetit. Cook with love.
Elsa doll cake – what could be cooler! Believe me, your girl and her friends will be absolutely delighted! You can do it, however, in this case you will need some skill to make a beautiful Elsa from mastic.
By the way, if you like the idea of a completely edible cake, you can watch our selection of master classes on creating small figures and Anna from fondant.
However, in this article we will look at options for how to make a “3D doll cake” using the doll directly. You will make such a cake faster and your little one will have double joy: after the delicious treat is eaten, she will get a charming new doll.
Cake with Elsa or Anna doll step by step with mastic decor
First, I want to show you a not-so-pretty option. Of course, there is nothing complicated about creating a cake with a doll. Sponge cakes coat with cream, arrange in the shape of a skirt and decorate. We insert the doll into the center, having previously wrapped its legs in cling film.

But keep in mind: if you don’t want to trim the sponge cake, coat it with buttercream to your heart’s content. Or cut off the excess biscuit, mix it with. Coat the skirt itself with ganache and return the cut biscuit in the form of a plastic mass, evenly distributing it over the surface. Then carefully decorate with fondant.
Then you will not have the same result as in the photo below: not enough cream plus the mastic was pressed too tightly. As a result, the skirt does not look fluffy and luxurious. In general, I don’t want to offend the author, but you can make it prettier.

Like, for example, here, a little cream, not too pressed with mastic - it looks good. Besides, you must agree: the more cream, the tastier.

For more information on how to make a neat skirt from biscuit with cream and decorate it, watch the video:
And another video with a very useful MK. Check out the brilliant caramel coat idea.

If you don’t want to coat your skirt with cream, just don’t press the mastic too hard like this.

Although, of course, carefully pressed mastic onto a properly prepared base looks better. Therefore, scroll below - beautiful options for cakes in the cold heart style in the form of Elsa and Anna dolls await you.

Elsa doll cake made from mastic step by step
So, first of all, it is not necessary to insert the doll into the very center of the cake. You can make a dress with a train. Plus, for a more harmonious combination of the doll with the cake (skirt), it is better to dress up the “toy” itself in mastic.
If you have a dome-shaped or skirt-shaped bowl, bake the sponge cake in it. Then just cut off the excess and coat with cream. Basically, form a skirt and cover it tightly with fondant. Using the same mastic, install the doll in place (photo No. 9).

Next comes the purely creative moment. Cut strips from blue mastic (the color of the one applied to the doll), and “pinch” them from the edges to give the effect of ruffles and flounces. And carefully glue one by one to the base of the skirt using sugar syrup.

For the final touch, brush the finished dress with an edible glitter brush and decorate it with white edible snowflakes.
Don't forget to make a shoe from mastic for the doll's foot, peeking out from under the dress.

For those who don’t have a baking pan with a suitable silhouette, don’t worry. Bake regular round cakes, coat them with cream (to secure the structure, it is better to secure them with wooden skewers). Next, cut off the excess and move it. Generously spread the finished skirt outline with chocolate ganache (photo No. 4). Let it dry a little at room temperature and cover with mastic.

Secure the toy. In addition, with the help of mastic you can slightly correct the shape of the skirt and make more natural transitions. Then make neat waves and ruffles.


The final touch is again sparkles and snowflakes. The result is a very beautiful cake.


You can also tint the skirt a little using food coloring. Or initially make shuttlecocks of different colors.

If you think this cake is too small, make it on an edible “stand”. Those. Prepare a round cake first, then place the Elsa doll on the cake.

Video example of such a cake:
By the way, look out for muffin tins with a hole in the middle. You won't have to cut anything. And in order for the dolls to stand tightly in the cake, you can additionally fill the hole with small marshmallows.

And another version of the Elsa doll cake from a cold heart. With a more formal, but no less elegant and original dress (it was also covered with edible sparkles), plus a cloak made of edible waffle paper.

The result is a masterpiece.

Anna doll cake from Frozen step by step
The Anna doll cake is made according to the same principle. We form a skirt, smear it chocolate cream and cover with mastic. It is also better to decorate the toy itself in color.

Neat patterns can be made using stencils and.

DIY doll cake with a “cream” skirt
Unfortunately, taste qualities mastics leave much to be desired, and not everyone can work with it. You can make a cake with cream the old fashioned way.
To make the skirt perfectly smooth, use baking paper. Then use a pastry syringe to apply decorations.


By the way, in order to make a doll cake, you don’t have to buy a Barbie. See what an adorable cake you can make for a birthday with a larger doll.

I absolutely love this cream rose skirt.

And here is a video with an amazing skirt decor with cream and marshmallows.
In general, you can find many more inspiring examples. And I guess I’ll wrap it up. Finally, a couple of photo ideas, namely two in one.
Cream version.

And with mastic.

Happy birthday to you and have the courage to create a beautiful cake!
RUB 14,800
RUB 12,350
To favorites
Characteristics
Production time from 3 days
The Padishah cake includes: Several layers of chocolate sponge cake soaked in Amaretto liqueur (or syrup). Cream based on natural cream, with Belgian chocolate combined with boiled condensed milk, caramel and almonds.
Add to Basket
You can make any changes to the cake. Weight, color, decorations, figures, etc.
One of the famous, new and full-length Disney cartoons is “Frozen,” which is loved by both children and adults. And how can you not fall in love with beautiful fairy-tale characters and an unusual plot? Well, if there are cartoons that are loved by many, then There are also cakes to order, embodying story ideas and hero figures. In this case, the cake is two-tiered in a soft blue color, decorated with snowflakes on the side and pieces of ice with blue Christmas trees on the surface, conveying the winter mood of the cartoon. On the surface of the first tier, Anna is sitting on a log - she is warmly dressed, with gloves on her hands, a cape on her shoulders, her feet in boots, as it should be in winter. Her hair orange color, as if speaking about her friendly and sunny nature. Olaf the snowman stands next to her. And at the very top stands Elsa - she is not cold, and she is wearing shoes, unlike her sister, in an open dress with a slit on the side. Her hair is white, reminiscent of winter and cold. The figures are made in accordance with the cartoon, observing the details of color and clothing, and even the figures stand separately, recalling the plot that Elsa was alone for a long time, and Anna and Olaf rushed to the rescue. A happy birthday greeting is written separately to order - red letters on white, indicating the name and age of the birthday girl.
*The price of the cake includes all additional decorations, products, figurines and packaging.
** The height of the cake is described without decor and whatnot, if present. The dimensions of the cake can be changed depending on the weight and density of the filling.
*** In the beta version of the site, prices may differ from real ones. Prices for cakes with berries are seasonal. Check with managers.
**** The color scheme of images on the site may differ from real ones due to the color rendering characteristics of the monitor.
Ingredients:
- Biscuit - 1 piece
- Apple juice - 40 ml
- Black chocolate - 1 pl
- For the custard:
- Egg - 1 piece
- Flour - 3 tbsp. l
- Milk - 500 ml
- Vanillin - 1 chip
- Sugar - 3 tbsp. l
For the protein custard:
- Sugar - 130 gr
- Egg - 2 pcs
- Water - 40 ml
Bright dessert for a children's party
What makes the atmosphere festive? Of course, a cake that is not only very tasty, but also beautiful, so that every guest will remember this day and treat for a long time. By preparing a dessert with your own hands, you will give a gift to everyone sitting at the table and at the same time demonstrate yourself as a first-class hostess.
Girls will especially like our “Frozen Heart” cake, because it is made based on their favorite fairy tale, and the sweet main character will lift your spirits just by looking at it. You can look at the photo of the heart-shaped cake and see for yourself. Do you want your dessert to catch the eye? Make it painted, bright and beautiful.
Preparing such a dessert is not as difficult as it might seem at first glance, just follow our recipe for decorating a simple sponge cake. Give your child a real holiday. Today, the cartoon “Frozen” is very popular; many children enjoy watching it several times, putting together puzzles with their favorite characters and carefully drawing them out in coloring books.
All this tells us that the Elsa Frozen cake is a win-win option for a children's celebration. Surely every housewife knows how to prepare a simple sponge cake, so in our recipe we focused on the design, and included the cake as an ingredient. A cream cake will take you no more than an hour of free time to prepare; put all the love for your child into it and it will turn out even tastier and more desirable.
Preparing creams
A fragrant hour and a homemade cake, what could be better for a family holiday? The “Frozen Heart” cake is the perfect dessert for the table at any time of the year and for any holiday, with a little effort you will have a real masterpiece in your home kitchen.
Prepare the sponge cake in advance, this way you will save time and will not be distracted from preparing creams and decorating.
Let's start with the custard:

- Mix the egg and sugar, adding a pinch of vanillin.
- Beat the resulting mixture with a mixer until smooth.
- Then let it brew for a couple of minutes and pour in some of the prepared milk. Mix the remaining milk with flour.
- Next, add the beaten egg mixture to the flour.
- Beat everything together with a mixer, then place on medium heat.
- Stir until the mixture turns into a thick, homogeneous mass. Sometimes lumps form in the cream, this is not a problem, just pass it through a fine sieve.
Cut the pre-prepared sponge cake into two, soak it in juice and apply cream between the parts, sparing it.
- Now let's move on to the chocolate, which first needs to be melted.
- Pour chocolate into a cornet; it can be made from available materials.
- We take a pre-printed drawing of Olaf the snowman and put it in a file, outline the contours with chocolate on top, not forgetting about the details. Place the file in the refrigerator to allow the chocolate to harden.
Now let's move on to preparing the protein cream. It is made on the basis of sugar syrup, so we start with it:

- Pour water into a saucepan and add sugar.
- Putting it on the fire, stirring the contents takes no more than a couple of minutes, then reduce the heat and leave the sugar and water alone.
- Total cooking time is 8 minutes.
- While our syrup is preparing, beat the egg whites until stiff foam forms.
- Carefully pour the hot syrup into the resulting mass without reducing the whipping speed. Continue using the mixer for another 8 minutes until the cream has cooled completely.
- Apply it in a thin layer to the top cake and level it out.
Even without mastic, the Frozen cake turns out very beautiful, and you will see this in the end.
Decorating the cake
While we were preparing the cream base, our chocolate snowman froze and it was time to put it into action. Place the chocolate figure on top of the protein cream and press lightly, the main thing is not to damage it. Paint the inside of the snowman with white cream using a pastry syringe.

The remaining cream can be tinted blue and applied to the rest of the cake; you can use absolutely any syringe attachment for this. The cream is applied to the sides of the cake and smoothed out with a pastry spatula. Don't forget to draw our hero's eyes by making small blue dots. You can also use various sprinkles for decoration.
Some housewives make a picture for the Frozen cake from sugar paper, but it is not so easy to find it in stores. For those who want to get the most realistic images of their favorite characters, it is better to use mastic, but for this you need to have at least an average level of confectionery skills.
Frozen cake for girls is the perfect surprise for your princess. Many choose the simple route and order dessert from pastry chefs, but by preparing it yourself, you will show true love and care, and such an act will remain in your child’s memory for a long time.